Saturday, 30 November 2013

How to restore DLL files on your computer


DLL or Dynamic Link Library files are very important part of programs and applications. So important are these files that the programs and applications will not run without them. Quite frequently it so happens that the Windows users encounter problems because of these DLL files. Although quite annoying, DLL repair is quite easy as long as you know how to do it.
Some of the most frequently occurring DLL file errors are run.dll, shell32.dll, system32.dllwmp.dll, kernell32.dll, rundll32.dll, xvid.dll, iframe.dll, kernel.dll and many more. These DLL files are mostly removed unintentionally. This generally happens while uninstalling a program; it may also so happen that there might be an occurrence of error because of any virus infecting the computer system. One need not worry when such a thing occurs as there are many ways in which this error can be repaired.

The problems and solutions

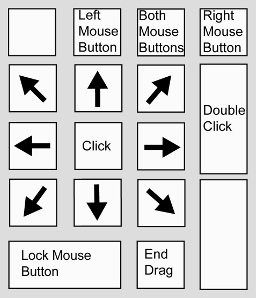
how to use your keyboard as a mouse


Hey Friends Today we will see how to Use A keyboard as Mouse, Yes you read it right, also i am not joking.
Its a very cool trick which everyone will love to try for sure and it is very simple as well.
in a situation where your mouse is spoilt, not available or maybe you want to simply impress your friends, you can use your keyboard as a mouse.it is a very simple method and you can access your keyboard like a mouse.
To do this just press
Alt+Left shift key+num lock

How to navigate everything with your keyboard?


The keyboard is one of the most important components of your desktop or laptop. Even if your mouse is not working, you can still operate the computer and accomplish all the tasks through the keyboard shortcuts. Also, the keyboard shortcuts help in improving your productivity as more amount of work can be done in less time. So if you are familiar with the keyboard functions, it will be very easy to perform the work even without the mouse or when it’s not working.

Let us explore more about the keyboard functions.
How to open a desktop program?
To open or run any program on the desktop, you can perform the following steps.
Step 1 – Press the Tab key to control the desktop icons
Step 2 – The Tab key will help you to select the desktop icons, anything from the taskbar and Start button
Step 3 – Once you are on the desktop, you can also use the arrow keys to move from one icon to another.
Step4 – Press Enter key when the icon is highlighted to Run the selected program.
Step 5- Sometimes the Tab key has to be pressed several times to navigate through desktop programs

How to root and install custom ROMs in android phones?

android-root-620x465
The trend of installing custom ROM’s and apps has brought a big revolution with many users trying to root their mobile devices to accomplish it. Rooting is a very sensitive task which should be done properly or else the device may lose its initial configuration and may result in malfunction of your gadgets. If you are fond of custom apps and ROM’s and what to integrate the same in your Android devices, you will have to first root your devices and then install the custom ROM’s.

Here is the step by step process to root and install the custom ROM’s in your Android phones.
Rooting your Android phones
Though every device has its own rooting process, but here we will discuss the general procedure to root the handsets which will work for all types of models.
Step 1 – In order to get started with rooting, dial *#*#2846579#*#* and you will be directed to the internal application which is used by the manufacturer. Here you can find out the different hardware’s installed on your device and can access the internal statistics as well.
Step 2 – Now look for Background Settings and then go to Log Settings
Step 3 – From the Log Settings menu, search Log Switch and enable it
Step 4 – Go to Settings and enable the USB debugging option as well
Step 5 –Install SuperClickOne app on your device and connect it to your desktop
Step 6 – Now extract the files from the zipped folder and run the exe file
Step 7 – On the top right corner, you will get find the option Root. Follow the steps and complete the rooting process
Step 8 – Restart your phone to confirm the changes

How to Remove Windows 7 Genuine notification


Not able to remove genuine Windows 7 successfully from your computer or laptop? Well then your problem is solved. The following few steps are quite easy and they will help you to very conveniently remove genuine Windows 7 from your PC. Many versions of Windows 8 are already in the market then why stay stuck with Windows 7. Even if you want to load some older version of Windows in your PC then also the following steps will help you out to successfully remove Windows 7 from your PC. The steps are very clear and precise.

The steps for removing Windows 7 Genuine from your PC are as follows:
  • Step 1: The first step is to pressing the Windows Key present on the left hand side of the keyboard. You can also simply click on the start button. Either way the start menu will appear once you do one of the above mentioned two things.
  • Step 2: Once the start option shows up go to the run option. Click on the run option. When you click on the run option, the run window will appear.
  • Step 3: Once the run window appears after clicking on the run option, you have to type “cmd” in it.CMD is the command to open the command prompt window. After typing cmd in the run window press enter and the command prompt window will open.